For all of you sleek blowout lovers out there, today’s post is for you. I’ve found the holy grail of blow dryer meets brush meets styling tool out there, and it has changed my hair life. It’s under $60 and WORKS. Add to this the right towel and product and technique, and you’ve got a salon-quality sleek blow out at home. ALL IN UNDER 25 MINUTES. Yes, you read that right. If you have shoulder length or longer hair, listen up!!
Blow outs at home used to be a semi-successful stop gap until I could get to the salon. In fact, I wrote a post last year about basically getting a semi-just-enough blowout out at home to hold you over until you could get to the salon haha! I could never get the tension or the angle or the volume right, and frizz was an issue. And p.s. I went to beauty school, so if I was struggling with this, chances are you were too. But then I found…
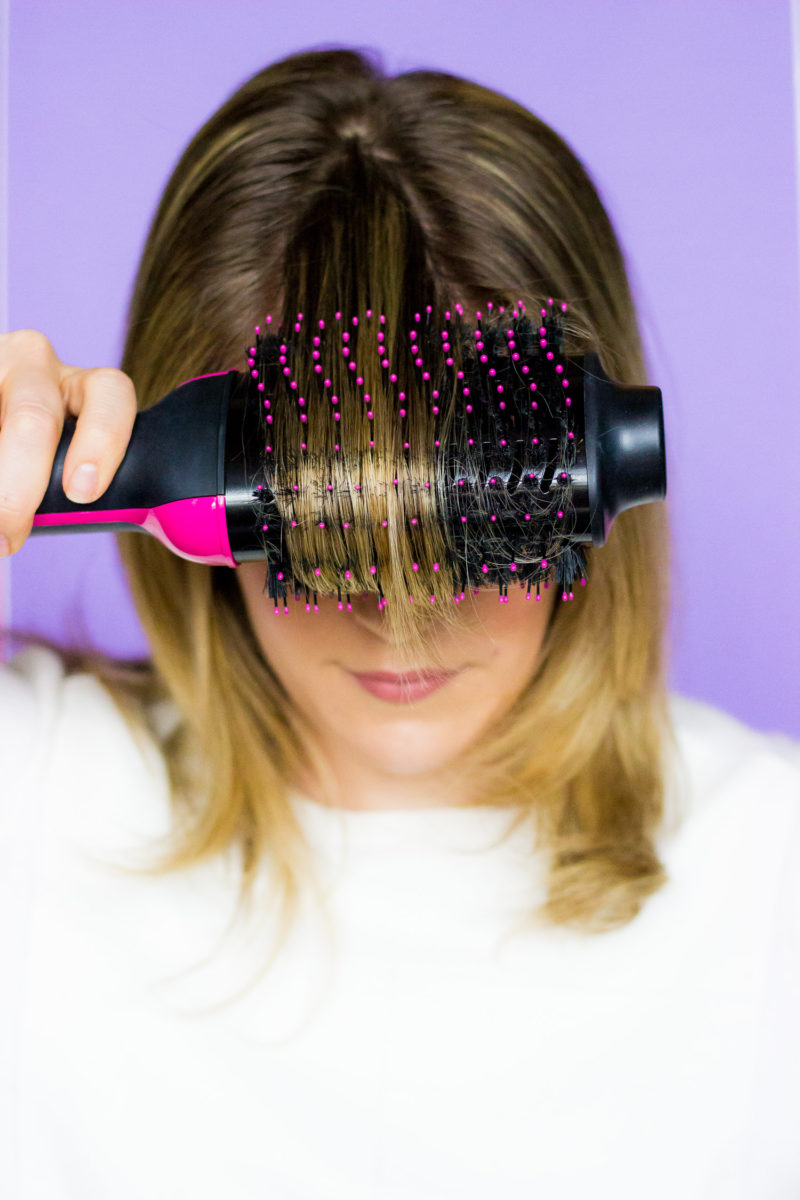
REVLON DRYER AND VOLUMIZER
This is not a sponsored post, I just REALLY love this Revlon One-Step Volumizer Hair Dryer, and I can’t believe I hadn’t found it sooner. I’ve been using it for about 2 months now, and it’s blowing my mind. Most brush dryers like this don’t work. They tangle your hair and the plastic bristles provide zero tension so your hair blows all over the place and gets frizzy. Completely ineffective. But not this one. It has two types of bristles – the plastic kind (these help detangle) and boar bristles (these provide the tension). It’s a match made in heaven! It also has two heat settings plus a cool shot. GALS – this is truly the best hair tool for blow drying at home I’ve EVER found. EVER. And I’ve tried a lot of tools. Buy it (here). You’ll thank me.
One of my followers Vanessa already pulled the trigger after seeing me gush about it on IG, and here is what she said: “It is magical! I have never been more obsessed with a styling tool in my life. In fact, besides my coffee maker, there isn’t an appliance I love more.”
Here’s the YouTube video if you want to cut to the chase! Otherwise, keep on reading for pics, tips and tricks!
MICROFIBER TOWEL
First step is to use a microfiber towel on after you wash your hair. These suck up a ton more water than normal and also cut down on frizz. This really helps to limit blow-drying time, and I put on my makeup while I’m letting this one work it’s magic. You can buy a 2-pack on Amazon for under $13 (here)!

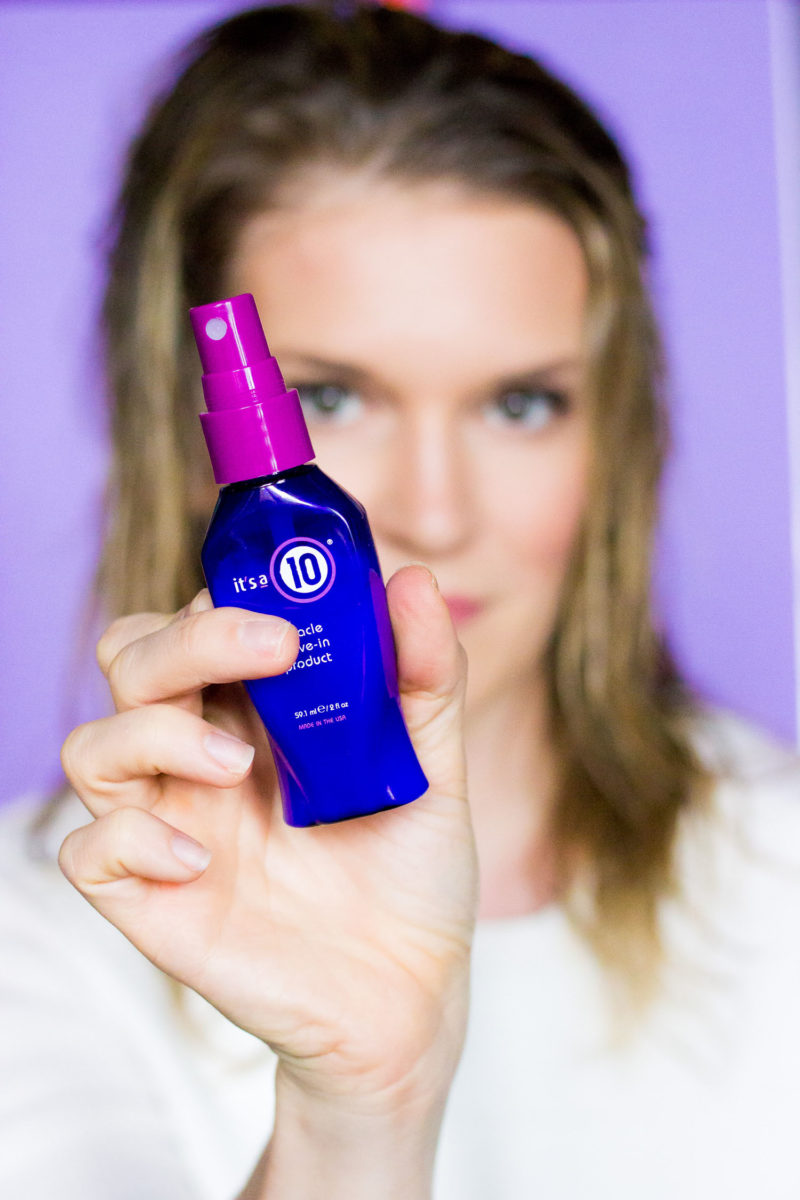
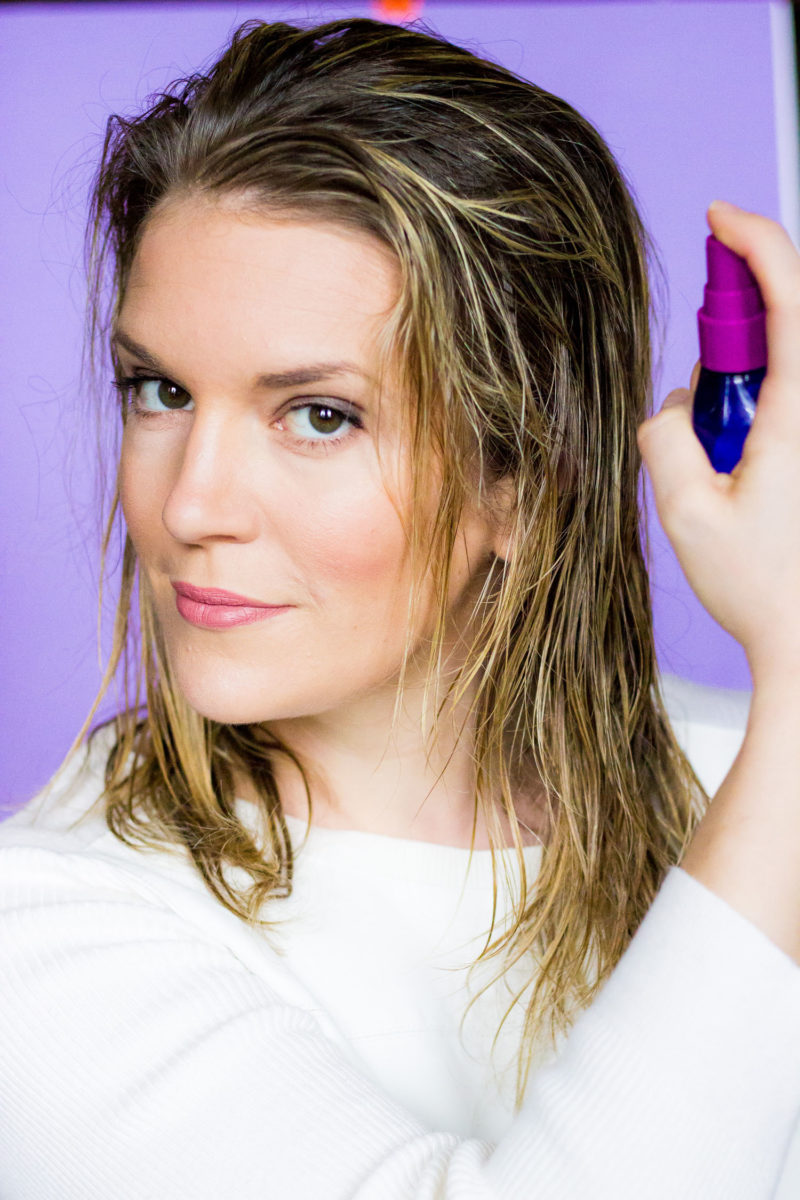
LEAVE-IN CONDITIONER & WET BRUSH
Next step is to spray in a leave-in conditioner and comb it through to prep the hair for the blow dry. I always buy sample sizes of products to test them out first, so I’d recommend doing that with the It’s a 10 Miracle Leave-In Product. It smooths your hair and cuts down on frizz. I’m sure it’s made of bad things because it works so good but man, y’all. It’s seriously effective. Plus, with this, you don’t have to use multiple products. Just one! They make a lighter version that a friend told me she prefers in summer so it doesn’t weigh her hair down too much, by the way. Follow the link to it here if you’re interested!
I also bought the small travel version of the Wet Brush, and it’s all I need for my length and thickness of hair. It’s also cheaper (under $6) than the big version! These have a cult following for their ability to comb through wet hair without pulling it out. No clue how they do it – looks like a regular paddle brush to me. But it works, and you can check it out here!

DRY IN SECTIONS
The key to a consistent blow out that is actually dry when you’re done is to dry by section. I do 2-inch high slices around the head at a time (sounds so Silence of the Lambs!!), starting with the hair behind the ears at the nape. Then I’ll move on to the sides of the head, and then the top. You can use any kind of clip, but I like alligator clips the best because they have teeth that keep the hair from slipping. The ones I use are from DryBar but they have cheaper versions out there (like these!)


PRO-TIPS AND TRICKS YOU DON’T KNOW
Don’t forget I went to beauty school! I’ve got some tips and tricks from the professionals under my sleeve for you here!
- USE UNDER- AND OVER-HAND STROKES – this helps make sure the cuticle is smooth underneath and on top. Key for making it last!
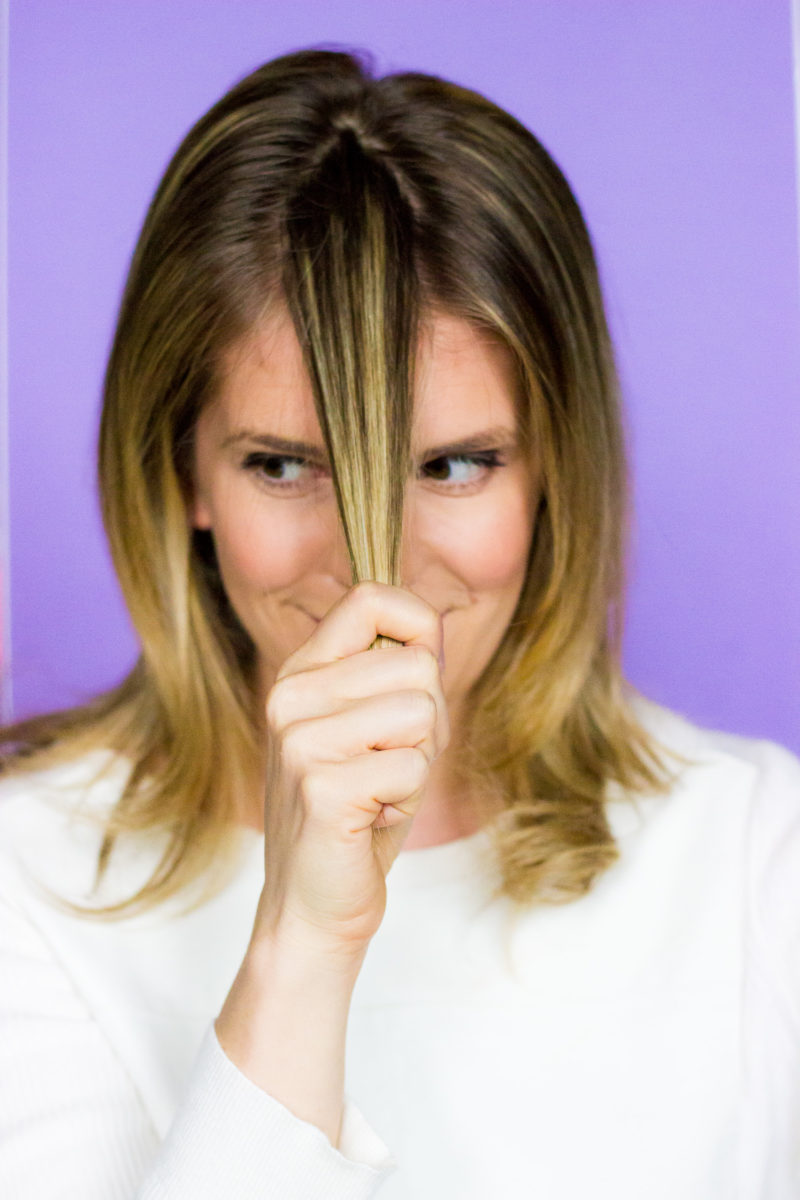
- PULL FRONT PIECES FORWARD AND OUTWARD – I do this to make sure the hair isn’t pasted against my face but is instead moving away from my face. There’s a picture of me doing that below to demonstrate.
- SOFTEN THE PART – I learned this one working in salons. Take a section of hair from each side of the part (after it’s dry) and brush/blow them together. Don’t worry, you won’t mess up the part. You’ll make it less stark!
- PULL UPWARD ON TOP LAYERS FOR VOLUME – Once you get to the top layer, you can start pulling up to create the volume you’d want in the style. I wouldn’t bother pulling up on the other sections – your am will start to hurt!
- OPTIONAL – USE FLATIRON TO SOFTEN KINKS – Sometimes I’ll do this if there is a stubborn wave on top that I can’t pull out with the dryer. Just depends on how OCD about my hair that day!


So I know I’m pushing this dryer pretty hard, but you guys are gonna love it! And I’ve gotta give credit where it’s due, by the way. I heard about all these things through friends: the dryer through my blogging buddy, Chanel (she has a fabulous blog here!). The micro-fiber towel through my stylist, Dyana (she works at the best salon in Atlanta and is the best stylist ever!). The leave-in product through a few people who featured it on Instagram. And the brush through my friend Emily (thanks, Em!). Thank you all because your powers combined have changed the game!
Still want more tips and how-tos? Head to my YouTube channel! It will give you the low-down on exactly how I hold the dryer, what the tips and tricks actually look like in practice and how the dryer truly transforms your style.

To buy any of these products, click through the links in the text above, or on any of the pics in the below shop the post widget. Note that this post contains affiliate links, which means I may receive a small commission if you purchase an item I recommend. Thank you for supporting Belle Meets World!

P.s. I still wear my hair curly once a week! If you’re looking for curly help, check out my two tutorials, How to Curl Hair with a Wand or How to Diffuse Curly Hair!